Weapons in Core
Overview
In a lot of video games, the main character uses a weapon to make their way through the game world. "Weapon" can mean a gun, an axe, or even a magical tomato grenade.
Programming a weapon can be the most complicated part of making a game, but to make that easier, Core comes with a built-in weapon system!
- Time to complete: 15 minutes
- Knowledge Level: Beginner - any knowledge!
- Skills you will gain:
- how to create a functioning weapon in Core
- how to use Multiplayer Preview Mode effectively
- how to create templates that can be used in weapons
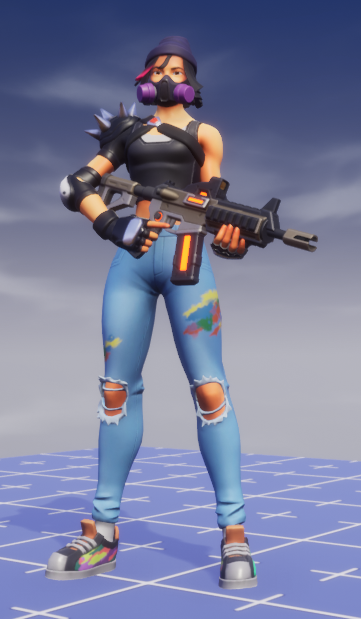
In Core, a weapon is an equipment type of object that can be created in any Core project.
There are a lot of differences between a piece of equipment and a weapon, but the main difference is that all weapons come with two built-in ability objects that handle the main use of the weapon.
An AttackAbility is bound to Left Click on the keyboard by default, and can be used for the traditional attack cycle of shoot-reload that you'd expect from guns--or for the cast-reel cycle you'd expect from a fishing pole!
A ReloadAbility is bound to "R" on the keyboard by default, and could be used for recharging and reloading of the weapon.
Info
The Advanced Weapon & Abilities Tutorial will go over these concepts in more detail and are best read after going through this tutorial.
When a player picks up or equips a weapon object, the player is instantly able to use that weapon and all the abilities that it comes with! So to create a weapon like a rifle, all that needs to be done is to spawn a weapon, modify the settings for how far the weapon can shoot, and set up the AttackAbility to activate.
Thinking Outside the Box
A weapon can be anything imaginable that the player holds and uses to interact with the world. This could be a fishing pole, a wand... anything that the player would use.
Tutorial
Each step of creating a weapon allows for added creativity. While doing this tutorial you might come up with more ways to fancify your weapon! We will walk you through the entire process from an empty project, to using a gun of your own making!
This gun will be placed in the world and the player will need to pick it up to use it.
So, let's get started!
Setting Up the Weapon
Basic Assault Rifle Model
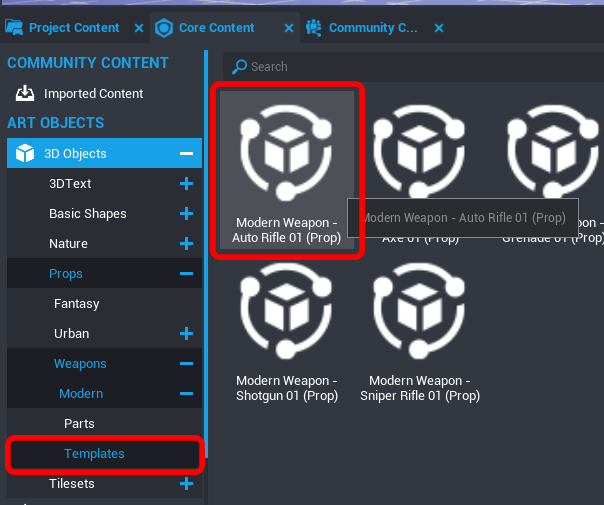
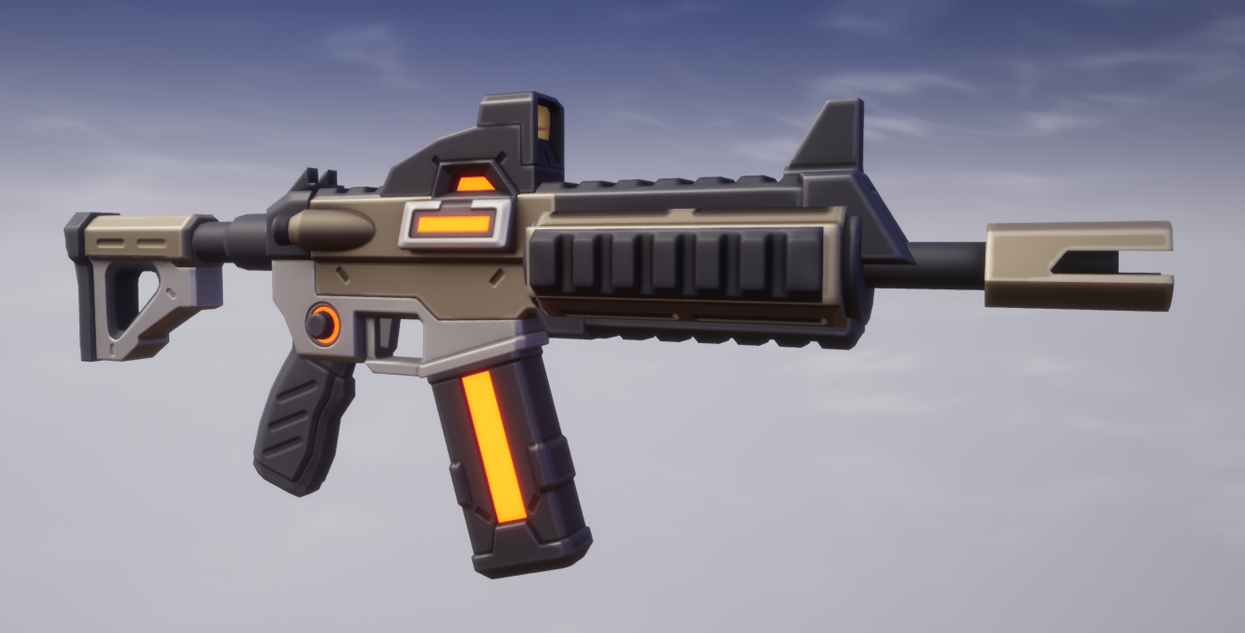 You could use the Modern Weapon - Auto Rifle 01 (Prop) in Core Content as a weapon model or make your own by combining different props in Core!
This folder of Core Content contains various pre-built weapons, as well as the parts that the weapons were made from. You can make all sorts of crazy things with this; from more weapons to space stations to anything you can imagine.
-
The first thing to do is to navigate over to Core Content, and scroll down to the GAME OBJECTS section. Within Gameplay Objects, drag a Weapon into your project Hierarchy panel.
-
A
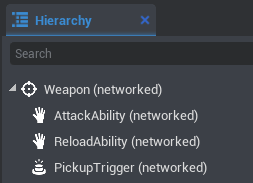
weaponin the Hierarchy includes twoAbilityObjects and aPickupTriggerbeneath it--these objects are "children" of the "parent" weapon object.- The
AbilityObjectsAttackAbilityandReloadAbilityare what we will use for the Attack and Reload abilities. - The
PickupTriggeris a type ofTrigger. This comes with all weapons by default so that they can more easily be picked-up in game!
- The
-
The in-editor window scene weapon will be completely "empty" having almost no visible parts at first--only the gizmos for the weapon and the trigger.
-
If you do not see anything at all in your scene, try pressing V to toggle the visibility of these gizmos.
-
The look of the weapon can be made from any Core primitives and shapes--there is a whole category of weapon parts that you can put together to make whatever you like!
This model should all be contained in a group, and this group should be made a child of the weapon by dragging the folder onto the weapon.
If you'd like more tips on how to model and create art in Core, visit the Art Reference page or try a Tutorial.
This attaches the visuals of the weapon to the function of the weapon!
-
-
Right click this Art group and select "Create Network Context > New Client Context Containing This" to keep the weapon's visuals within a Client Context folder.
This is better for overall performance, and should always be done for visuals that aren't directly related to gameplay. Since it's the bullets and the actual impact that affects gameplay, we want the gun itself to not be taking up performance space.
-
Finally for gun visuals, select that Client Context folder, and navigate to the Properties window. In the Scene section, change the Collision drop-down menu from Inherit from Parent to Force Off. This way the gun won't get stuck on the player and move the camera to weird locations.
-
Your Hierarchy should now look like this:

-
At this stage, you can already pick up the weapon when playing the game and trigger a fire animation when left-clicking on a mouse. This is closer to our goal--but we still need it to actually fire bullets!
-
You may also notice that the weapon, when equipped, could be not at all in the right spot. The animations should be correct, but the weapon position might be through your body or above your head, or rotated all weird.
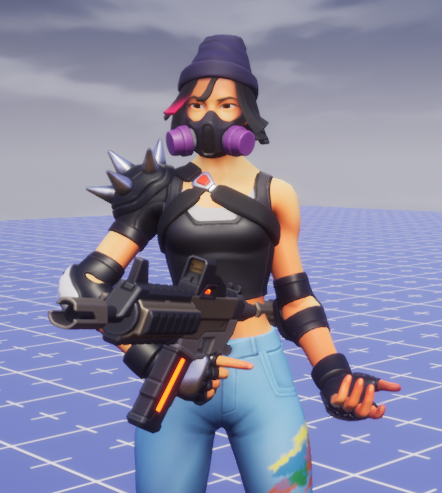 When equipped, the weapon's origin will snap to the attachment point or "Socket". The odds are high that the weapon will be held in the wrong spot when equipped the first time.
To fix the weapon model's position:
-
Make sure that within the weapon's Properties panel, the Socket property is set to
right_prop.For a full list of all possible sockets that you could use, check out the Lua API Guide.
-
Once you've made sure that is happening, scroll down to the Utility section of Core Content.
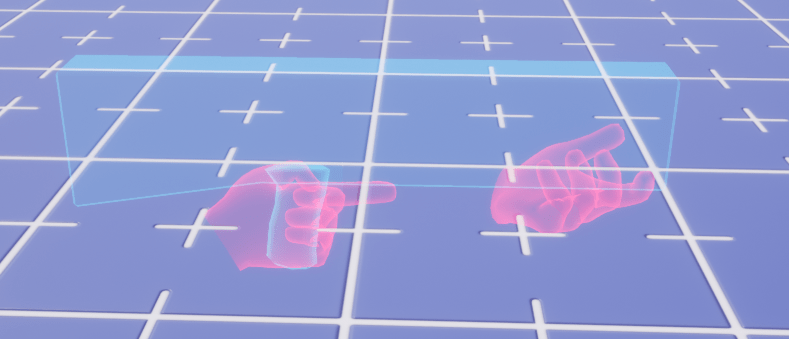
In here is a tool for visualizing how to position a gun in the player's hand--the Weapon Guide 2hand_rifle. Drag this onto the
weaponin your Hierarchy, to make it a child of the weapon. -
With the Weapon Guide 2hand_rifle selected, Set all Position Transforms in the Properties window to 0. This will center it within the
weaponobject. Now, move your art folder within theweaponaround in the world to align with the hands of this model.
This takes some wiggling--do what looks best to you!
-
Buildin' the Bullets
Currently, the weapon can't shoot anything! For a bullet to fire out of the gun when using Left Click to fire, a bullet template needs to be dragged into the weapon.
-
Click on the
weaponin the Hierarchy window. In the Properties window, scroll down to the Weapon section. Make sure that Is Hitscan Weapon is checked off.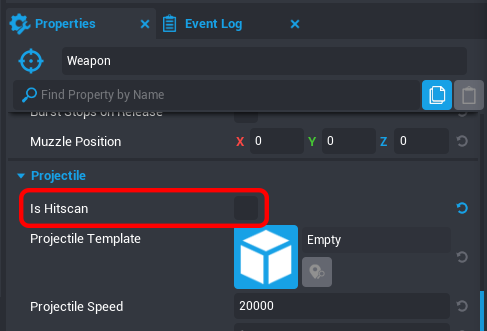
"Hitscan" means that the weapon would immediately have an impact on whatever it is shooting at, meaning the bullet wouldn't need to travel through the air. It also means that there isn't a visible bullet! In this tutorial, we're going to build a projectile bullet.
Having a projectile also means that you can change how fast it travels through the air, along with other settings in the Weapon section.
-
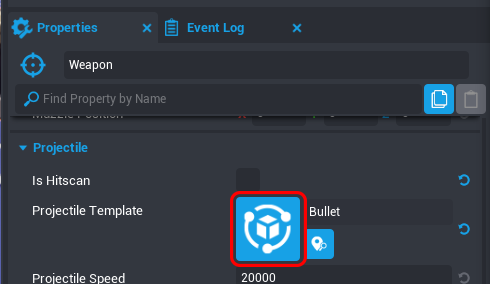
Look right beneath Is Hitscan. There is a property called "Projectile Template". Here is where we would drag a template for the bullet!
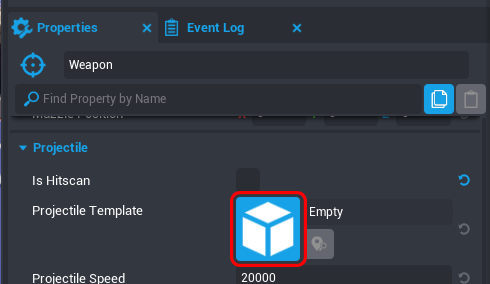
To do this, let's add a
Cone - Bulletobject to our project Hierarchy. This can be found in Core Content, within the Basic Shapes section. Drag one into the viewport, and change the scale to shrink the size until you are satisfied with the bullet shape.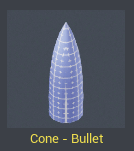
Try changing the material too--maybe plop a Gold material onto the bullet for extra coolness damage.
You might also want to rotate the bullet 90 degrees, in the event that it fires out of the gun sideways.
-
Once you are happy with the bullet shape, right click the object in the Hierarchy and click "Create Network Context > New Client Context Containing This" just like earlier to wrap our object in a Client Context folder.
This needs to be done so that our resizing is saved--whenever a template is spawned in Core, it will always have even 1:1 transformations, which would ruin our shape. We also need it to be easy on the game, so the Client Context folder will, like earlier, protect games from needing to keep track of every bullet fired.
-
Right click this folder, and click "New Group Containing This" to further wrap our bullet. Right click this new group and click "Enable Networking".
Bullets need to be both Client Context, and wrapped in a Networked object to be perform really well in-game.
-
Next, right click this folder again, and click "Create New Template From This". Name it "Bullet", or whatever you would like.
-
Once it is a template, delete it from the project Hierarchy. We now can drag that bullet template from our Project Content tab into the Projectile Template property of the weapon!
Firing the Weapon
Weapons come with a property for Damage--setting this determines how much getting shot by this gun will hurt other players!
Not All Weapons Need to Shoot
The weapon system can be used for things that aren't weapons! If you were making a bubble blower, or a fishing pole, perhaps you would set the damage to 0 and use different visual effects. The key is that this is what actually happens when the player uses the weapon!
-
With the
weaponitself selected in the Hierarchy, check the Properties panel. Here is where we can set the Damage property to whatever we would like. In this case, let's set it to 25, so it will take 4 shots to kill a player with 100 health. -
Now the weapon is set up to work! Test it out by using Multiplayer Preview mode, with 4 players selected.

- To make sure the fake players (also called "bots") are on the enemy team, create a Team Settings Object by dragging it into your project Hierarchy. This can be found in the Core Content tab, within the Settings Objects section.
- With the Team Settings Object selected, check the Properties tab. Change the Team Mode to Free For All. This will make all spawned players be on their own individual team, so that you can shoot at them!
- With Multiplayer Preview Mode turned on to four players, press the blue Play button.
- From one client window, pick up your weapon by walking into it, and shoot at the other KurtleBot player by using Left Click.
If you've set up everything correctly along with this tutorial, the player bot should die after 4 shots!
Now all the basics are hooked up! The gun should be able to shoot and kill other players--if not, try going back through the steps above to see where something might be missing. Typos are a common human error, check those and don't worry about having missed it the first time. Even the very best will miss things like that!
Adding Visual Effects
Right now, it's not super satisfying to shoot the gun--it's impossible to tell if you've made contact when shooting another player. We expect some sort of splatter to happen!
Core has tons of visual effects and sound effects (often abbreviated to vfx and sfx) built-in that we can drag and drop onto the weapon.
Let's start adding in some cool effects--starting with the moment of impact.
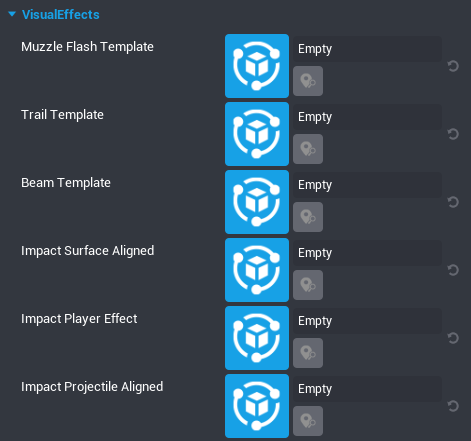
You might notice if you try dragging an effect from Core Content into the weapon object's properties, it doesn't work. This is because the weapon properties only accept a template type of object. So, we need to make one!
-
We'll start with a visual effect. In the Core Content tab, search for "generic player" and look for the object called "Generic Player Impact VFX". Drag this object into your project Hierarchy.
This visual effect is a little poof of smoke that happens briefly when played.
-
By default, the color of the smoke is white. If you'd like to make this look like a blood splatter, or a poof of dust, try changing the color property to whatever you'd like.
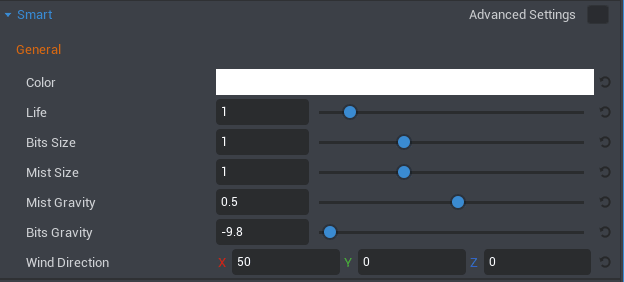
All visual effects in Core can be found in the Effects section of Core Content.
-
To preview the effect, press the Play button at the top right of the Properties tab for the effect.
-
-
Next, let's grab an audio object to make sounds when a player is shot.
-
In Core Content, search for "bullet body" and several different bullet impact sfx objects will show up. Feel free to listen to or use any of these, but in this case let's grab the "Bullet Body Impact SFX" and drag it into our project Hierarchy.
-
With this SFX selected in our Hierarchy, look in the Properties window. To enable our sfx to be heard through walls, and to make the sound fade the further away a player is from it, we need to change a couple settings.
Click the box for Enable Attenuation to turn it on, and do the same for the box for Auto Play. Uncheck the box for Enable Occlusion. You can hover over the names of the properties to read a little more about what they do.
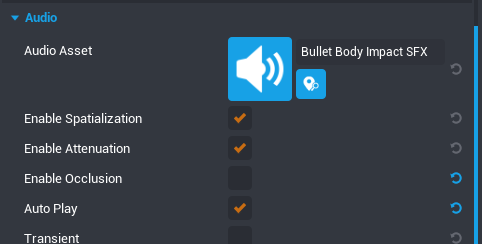
We want attenuation enabled so that the sound of impact is harder to hear the further away you are from the impact, just like in real life.
Auto play makes it so the sound effect plays immediately when it is created, which is exactly what we want for lining up the sound with the moment a player is hit.
We're turning off occlusion so that a shot can be heard through walls, meaning walls won't stop us from hearing that we made a successful shot.
Don't be afraid to experiment with any of the settings you see--different combinations make for a totally different gameplay experience!
-
-
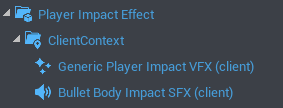
Now that we have these two effects in our Hierarchy, hold shift to select them both and right click to open the context menu.
Hover over "Create Network Context" and click "Create Client Context Containing This" to wrap both objects in a Client Context folder.
-
Right click this new Client Context folder, and click "New Group Containing This" to wrap the whole thing in a group. This is the usual best practice for making templates with Client Context content.
Name the group "Player Impact Effect".
-
Right click this new group, and click "Create New Template From This" to make this whole little effect we made a template that we can use elsewhere, or even publish to Community Content should you so choose!
-
Now that it is a template, it can be found in our Project Content tab. Just like the bullet from earlier, delete the template we just made from the Hierarchy and then select the
weaponobject.Scroll down in the Properties window to the VisualEffects section, and look for the Impact Player Effect slot. Drag your Player Impact Effect from your Project Content into this slot, and test out the weapon!
Now that you've made one effect, try making other types of effect templates for the other sections of the weapon's effects! A good one to add is the Impact Surface Aligned effect--this happens when the player shoots something that isn't a player, like a wall or the floor.
Check it out in multiplayer preview mode to see how it feels!
This is a really simple version of a gun. Each part could be done a different way or made more complicated for whatever your imagination can dream up! You could go back into what we have created to add more effects or change the way it works.
Getting Real Fancy
What we've done here is the simple setup! Using this method you can make any sort of basic weapon you can dream up just by changing different properties of a weapon and its abilities.
If you want to try you hand at some coding to really add complexity to your weapon, and give it even more abilities, check out our Advanced Weapons & Abilities Tutorial to feel for what can be done.
Examples
- Spellshock uses all sorts of weapon that you can tear apart and look through to repurpose for your own means.
- Core Content includes ultra-basic & advanced versions of a Pistol, Rifle, and a Shotgun! Use these to compare with what you have made in this tutorial--or always just start from scratch with these instead!
Was this page helpful? Can it be improved? Please let us know your feedback!